

I have a confession to make. I love pie. In fact, I could eat one a week if it wasn’t for my waistline. The other part of this confession is although I consider myself an accomplished cook, I have always used a refrigerator crust. You heard right, a processed refrigerator crust! It’s a little embarrassing. I have dragged around my FOC (fear of crust) since 1964 and my first solo attempt in the kitchen. Really, why is it the simplest things can nourish an insecurity of a lifetime?
The genesis of FOC, started when I was ten years old. I wanted to make an apple pie with a homemade crust. My parents were having guests for dinner; I wanted to provide the dessert. My labor of love took all afternoon. Somehow when measuring out the ingredients, I had put one tablespoon of salt rather than one teaspoon in the crust. Although the pie looked pretty good for a rookie, it was virtually uneatable. When I woke up the next morning my mother told me that Mr. Dodge had eaten a whole piece of pie. He also consumed an alarming amount of water afterward. My fragile ego could not deal with being the brunt of endless jokes. I tucked away this small failure and never spoke of it again. FOC blossomed into a complete neurosis about crust and baking in general. I was a cook, not a baker. Over time I reasoned that a purchased crust was simply a time-saving measure.
The kitchen has always been my favorite part of my home. It is my passion, my therapy and a reflection of my livelihood as a vegetable farmer. Why was I still carrying this FOC around? So…I promised myself that I would master two things that I was reluctant to try. 1) Make a decent pie crust and 2) Learn the art of pan frying fish (more on this later). I mean really….how hard can it be?
To that end, I researched two approaches. It seems that you are either a food-processor type, or a traditionalist. Although I use my food-processor for many things, I decided that in this case, I would follow tradition and use a pastry cutter. The next step was to just do it!

Assembling the ingredients.
What I really learned in researching pie crust, was that it’s really all about temperature. Both the butter and your water need to be cold. Very cold. If things warm up while you are cutting the butter into the flour, then chill it down for 15 minutes before you add your ice water. You want to keep those small pockets of butter intact. That’s what gives you the flaky crust we are all looking for.
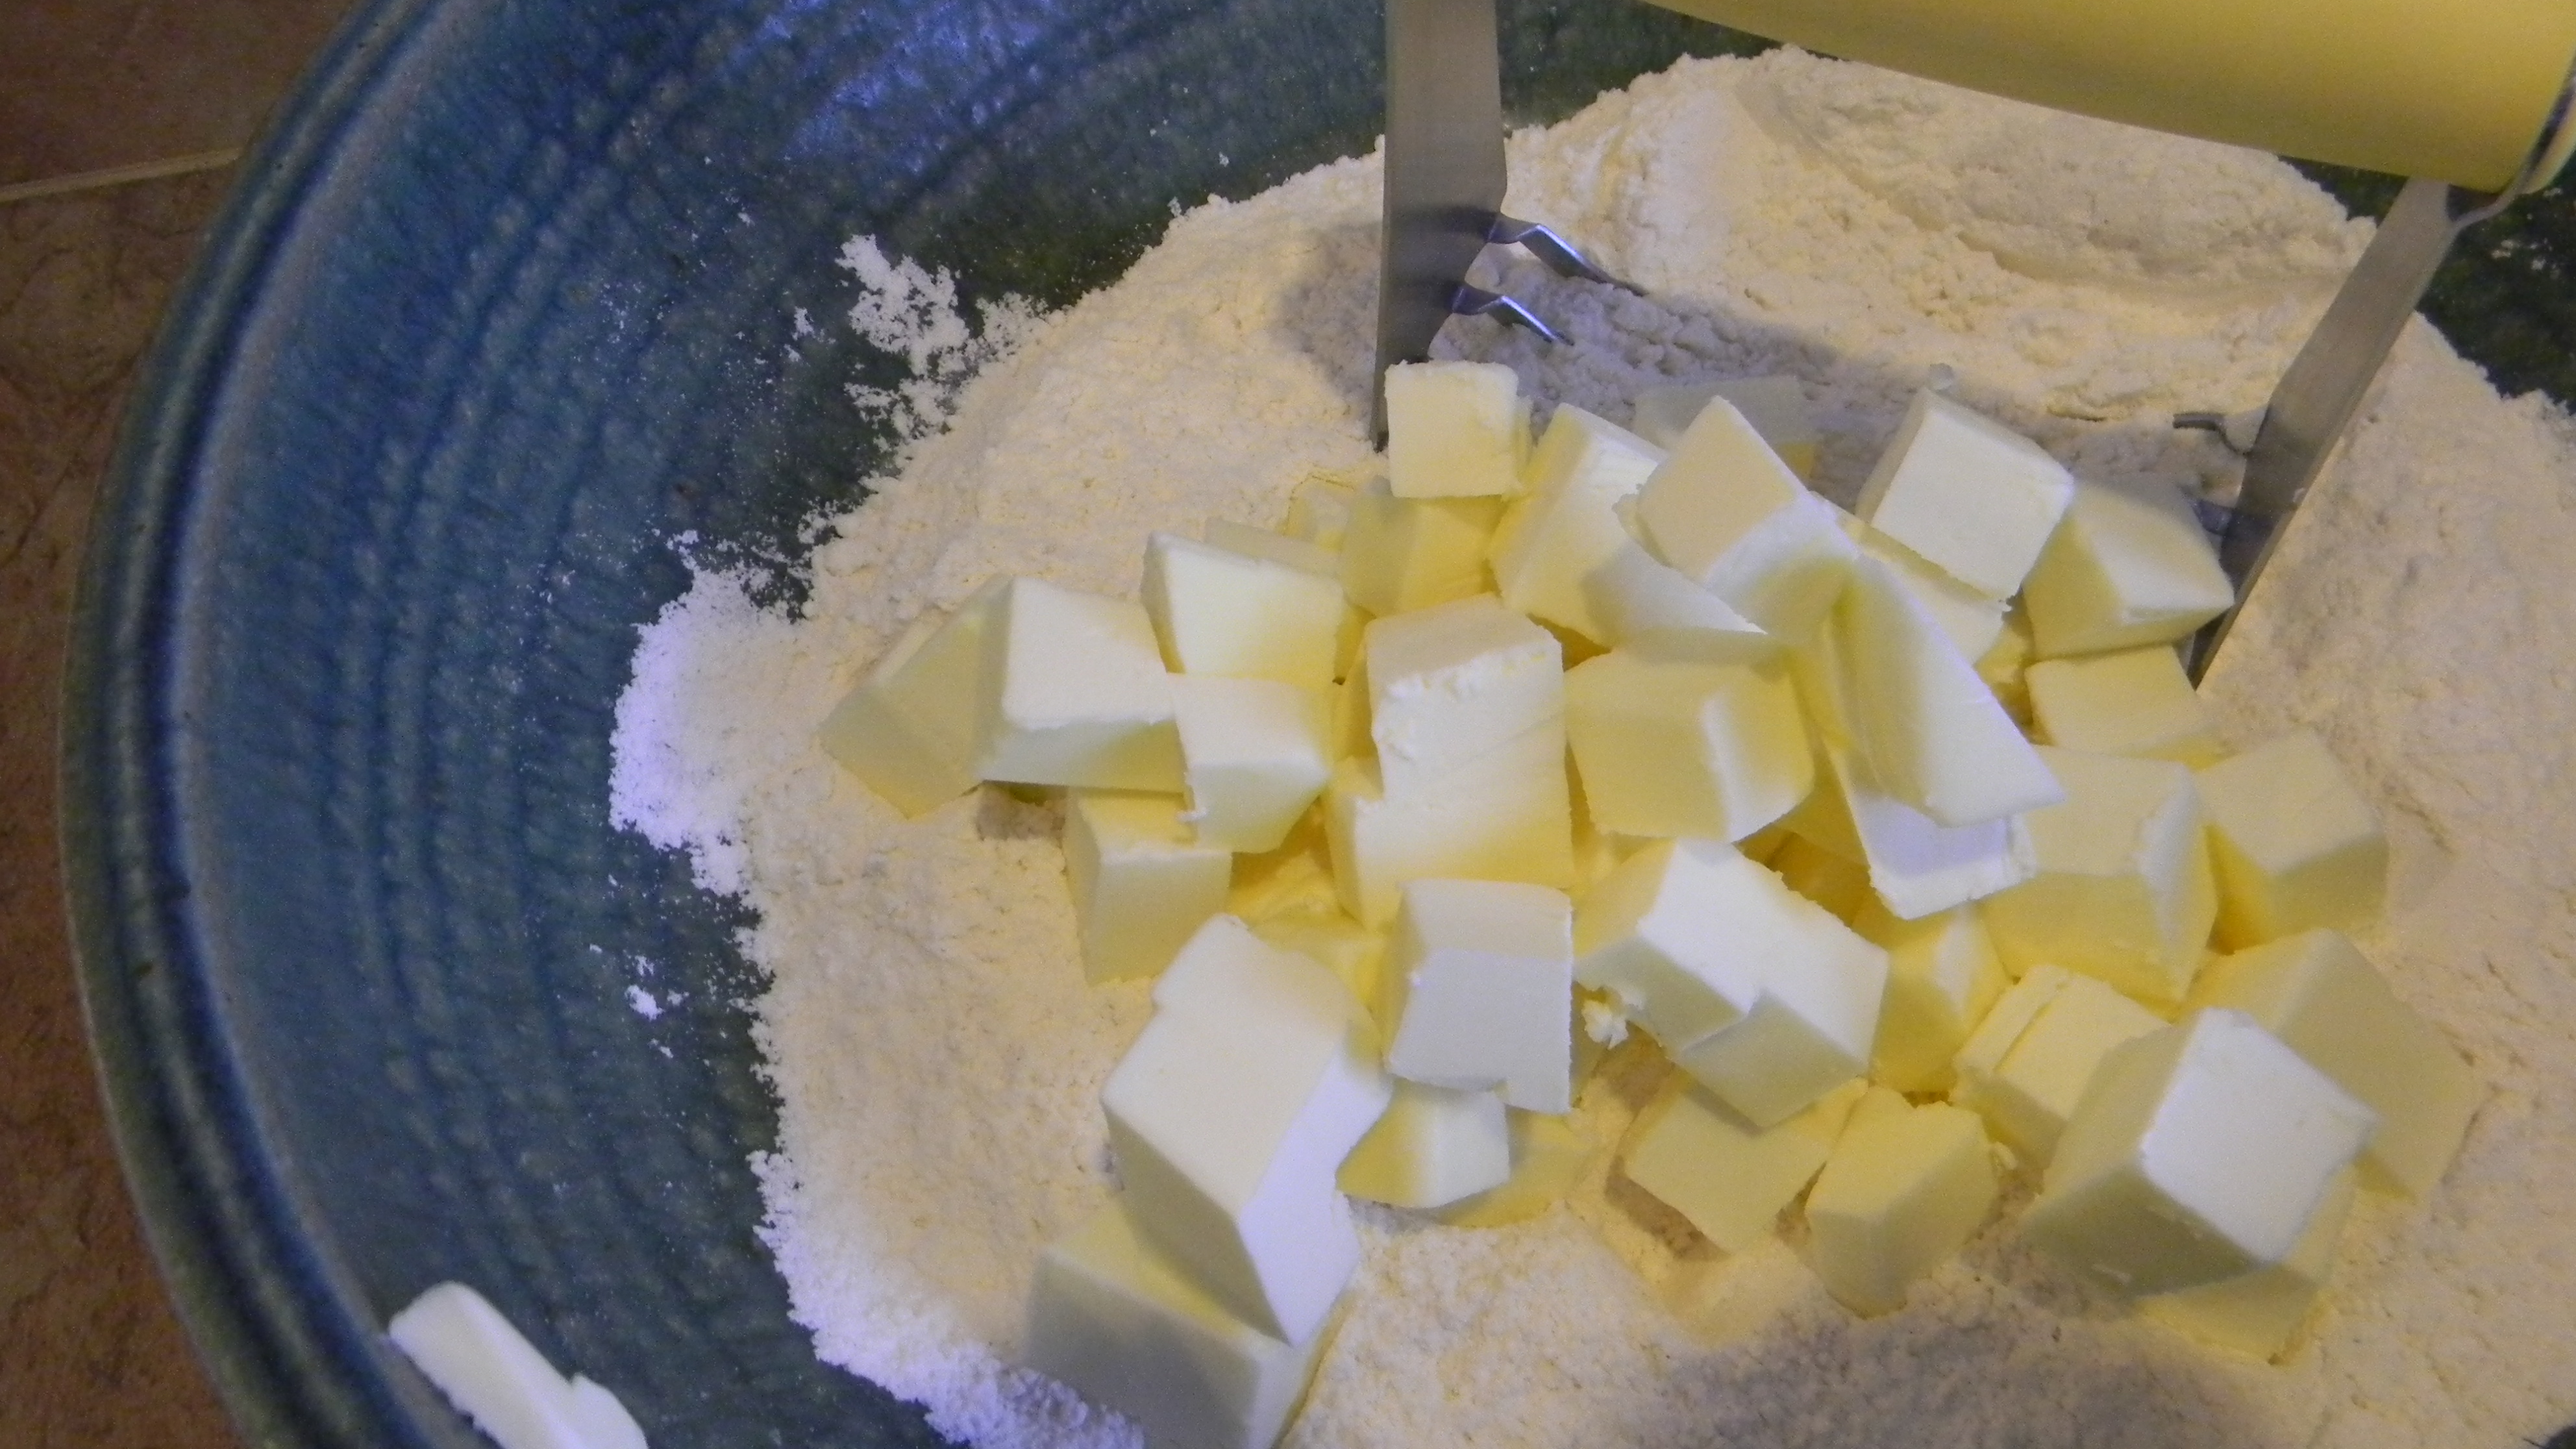
Preparing to cut in the butter with my pastry cutter.
For the crust:
- 2 1/2 cups all purpose flour
- 1 tablespoon sugar
- 1 teaspoon salt
- 16 tablespoons unsweetened butter (two sticks)
- 1/2 cup ice water
- Mix the dry ingredients in a bowl (a wide bowl is helpful for this). Cut butter into tablespoons and add it to the dry ingredients. Using your pastry cutter, quickly cut your pats of butter into your dry ingredients; you want to end up with butter the size of small peas.
- Once you add your ice water, you want to initially mix with a spatula, until you have a shaggy ball. You can then use your hands to incorporate the rest of the dry ingredients. When the dry ingredients are pulled together and you have a ball, divide it in half, making two separate disks, then wrap each one in plastic wrap. Refrigerate for an hour. This dough will keep in the refrigerator for about a week; in the freezer even longer. This recipe makes two 9-inch pie crusts, or one 9-inch covered pie.
While you are waiting for your crust to chill, prepare your filling. In this case, rather than using a pie plate, I want to do a rustic style pie, which is more free-form, with less filling.
For the filling:
- Peel, core and slice four fresh apples. I used Macintosh and Granny Smith. I like the sweet Mac’s against the tart Granny’s. Put in a medium bowl.
- Mix 1/2 teaspoon ground cinnamon, 1/4 teaspoon ground nutmeg and 1/4 cup granulated sugar and 2 tablespoons flour, in a separate bowl.
- Add the dry ingredients to the prepared apples. Toss and mix thoroughly with your hands.
- Add the juice of one lemon to mixture. Toss again.

Prepared filling ready to go.
To roll out crust preheat oven to 375 degrees:
- When you are ready to roll out your dough, dust your kitchen counter generously with flour (I like to use a silicone baking sheet, since we have tile counters). Dust the top of your disk of dough and also your rolling pin with flour as well.
- Start to roll out your crust, changing directions as you go, lifting your crust in quarter turns every couple of rolls, until you have the desired size and shape. If you dough sticks, lift with a bench scraper and sprinkle a little flour underneath. If your dough becomes too soft, place it on a baking sheet and put it back in the freezer for a few minutes. Your don’t want to melt the small peas of butter.
- If you want to use your crust in a pie pan, fold gently into quarters and place in the center of your pan; if making a rustic pie, place on top of a baking sheet covered with parchment paper.
- Place your filling in the center of the disk, leaving 2 inches of border. Fold border gently over the filling, leaving some of the filling exposed.
- Brush the top of the crust with a little whole milk, then sprinkle with turbinado sugar.
- Bake for 35-45 minutes or until crust is golden.
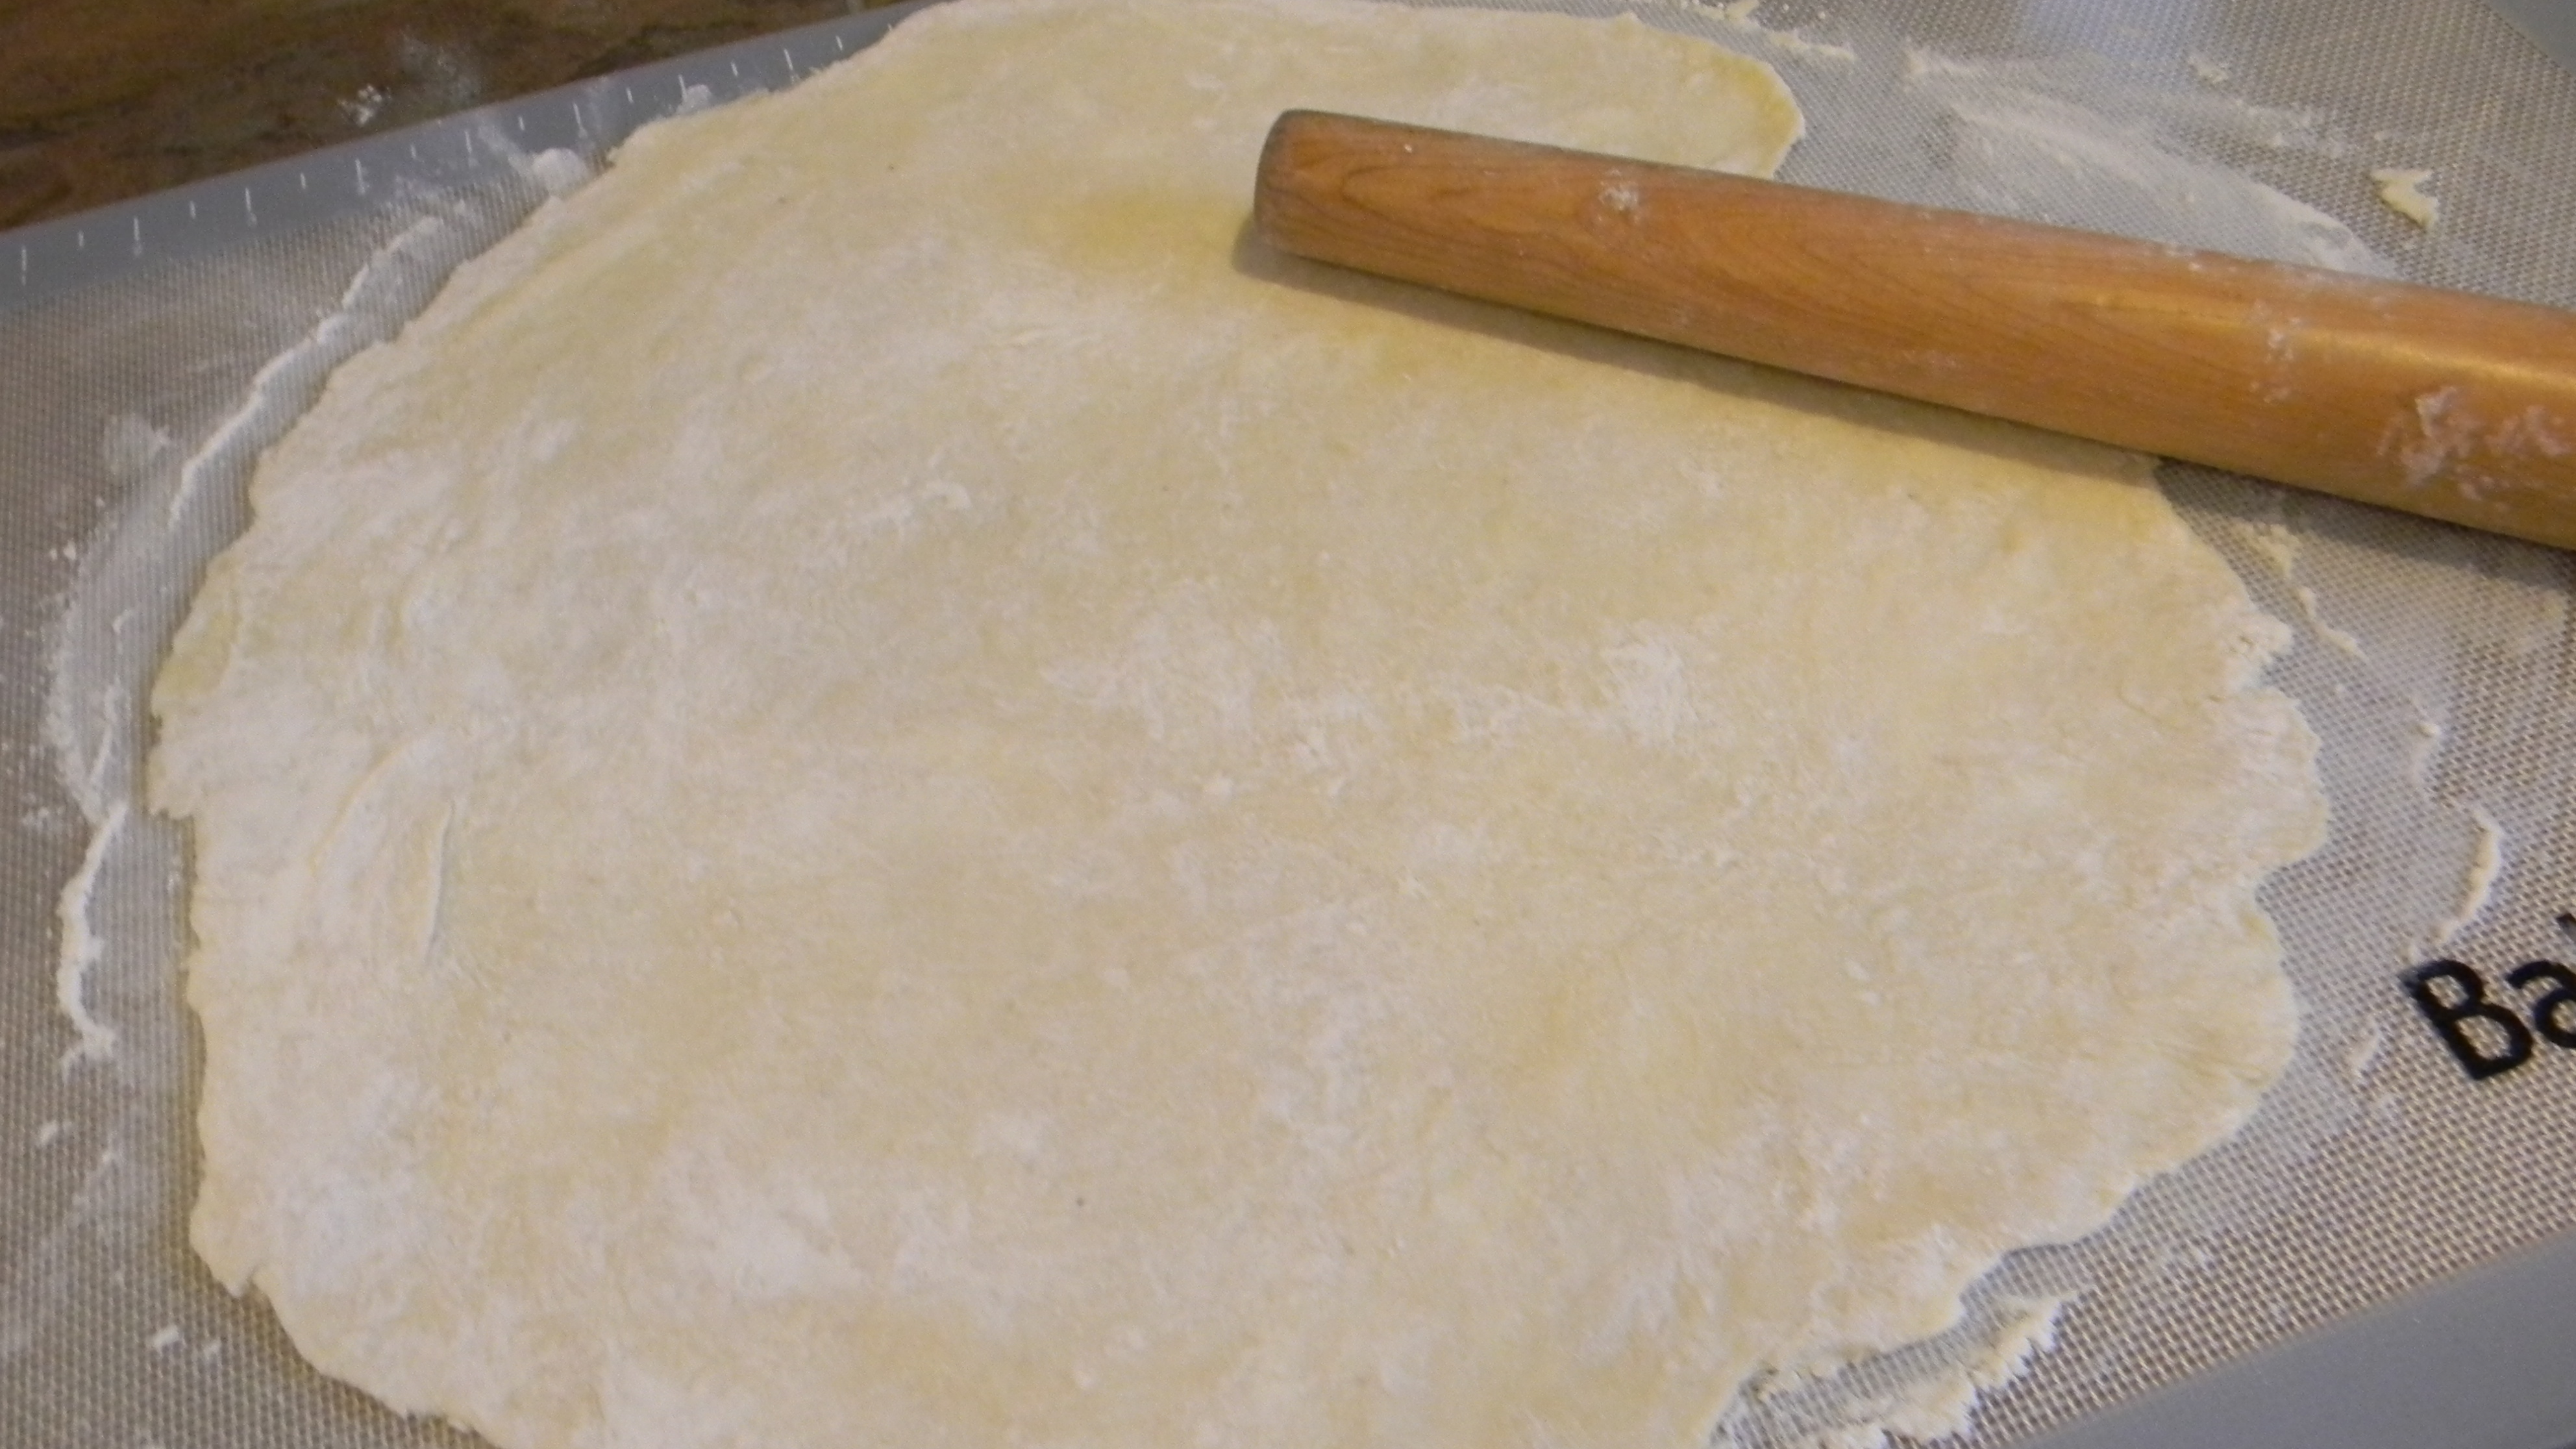
My crust rolled out and ready to fill.
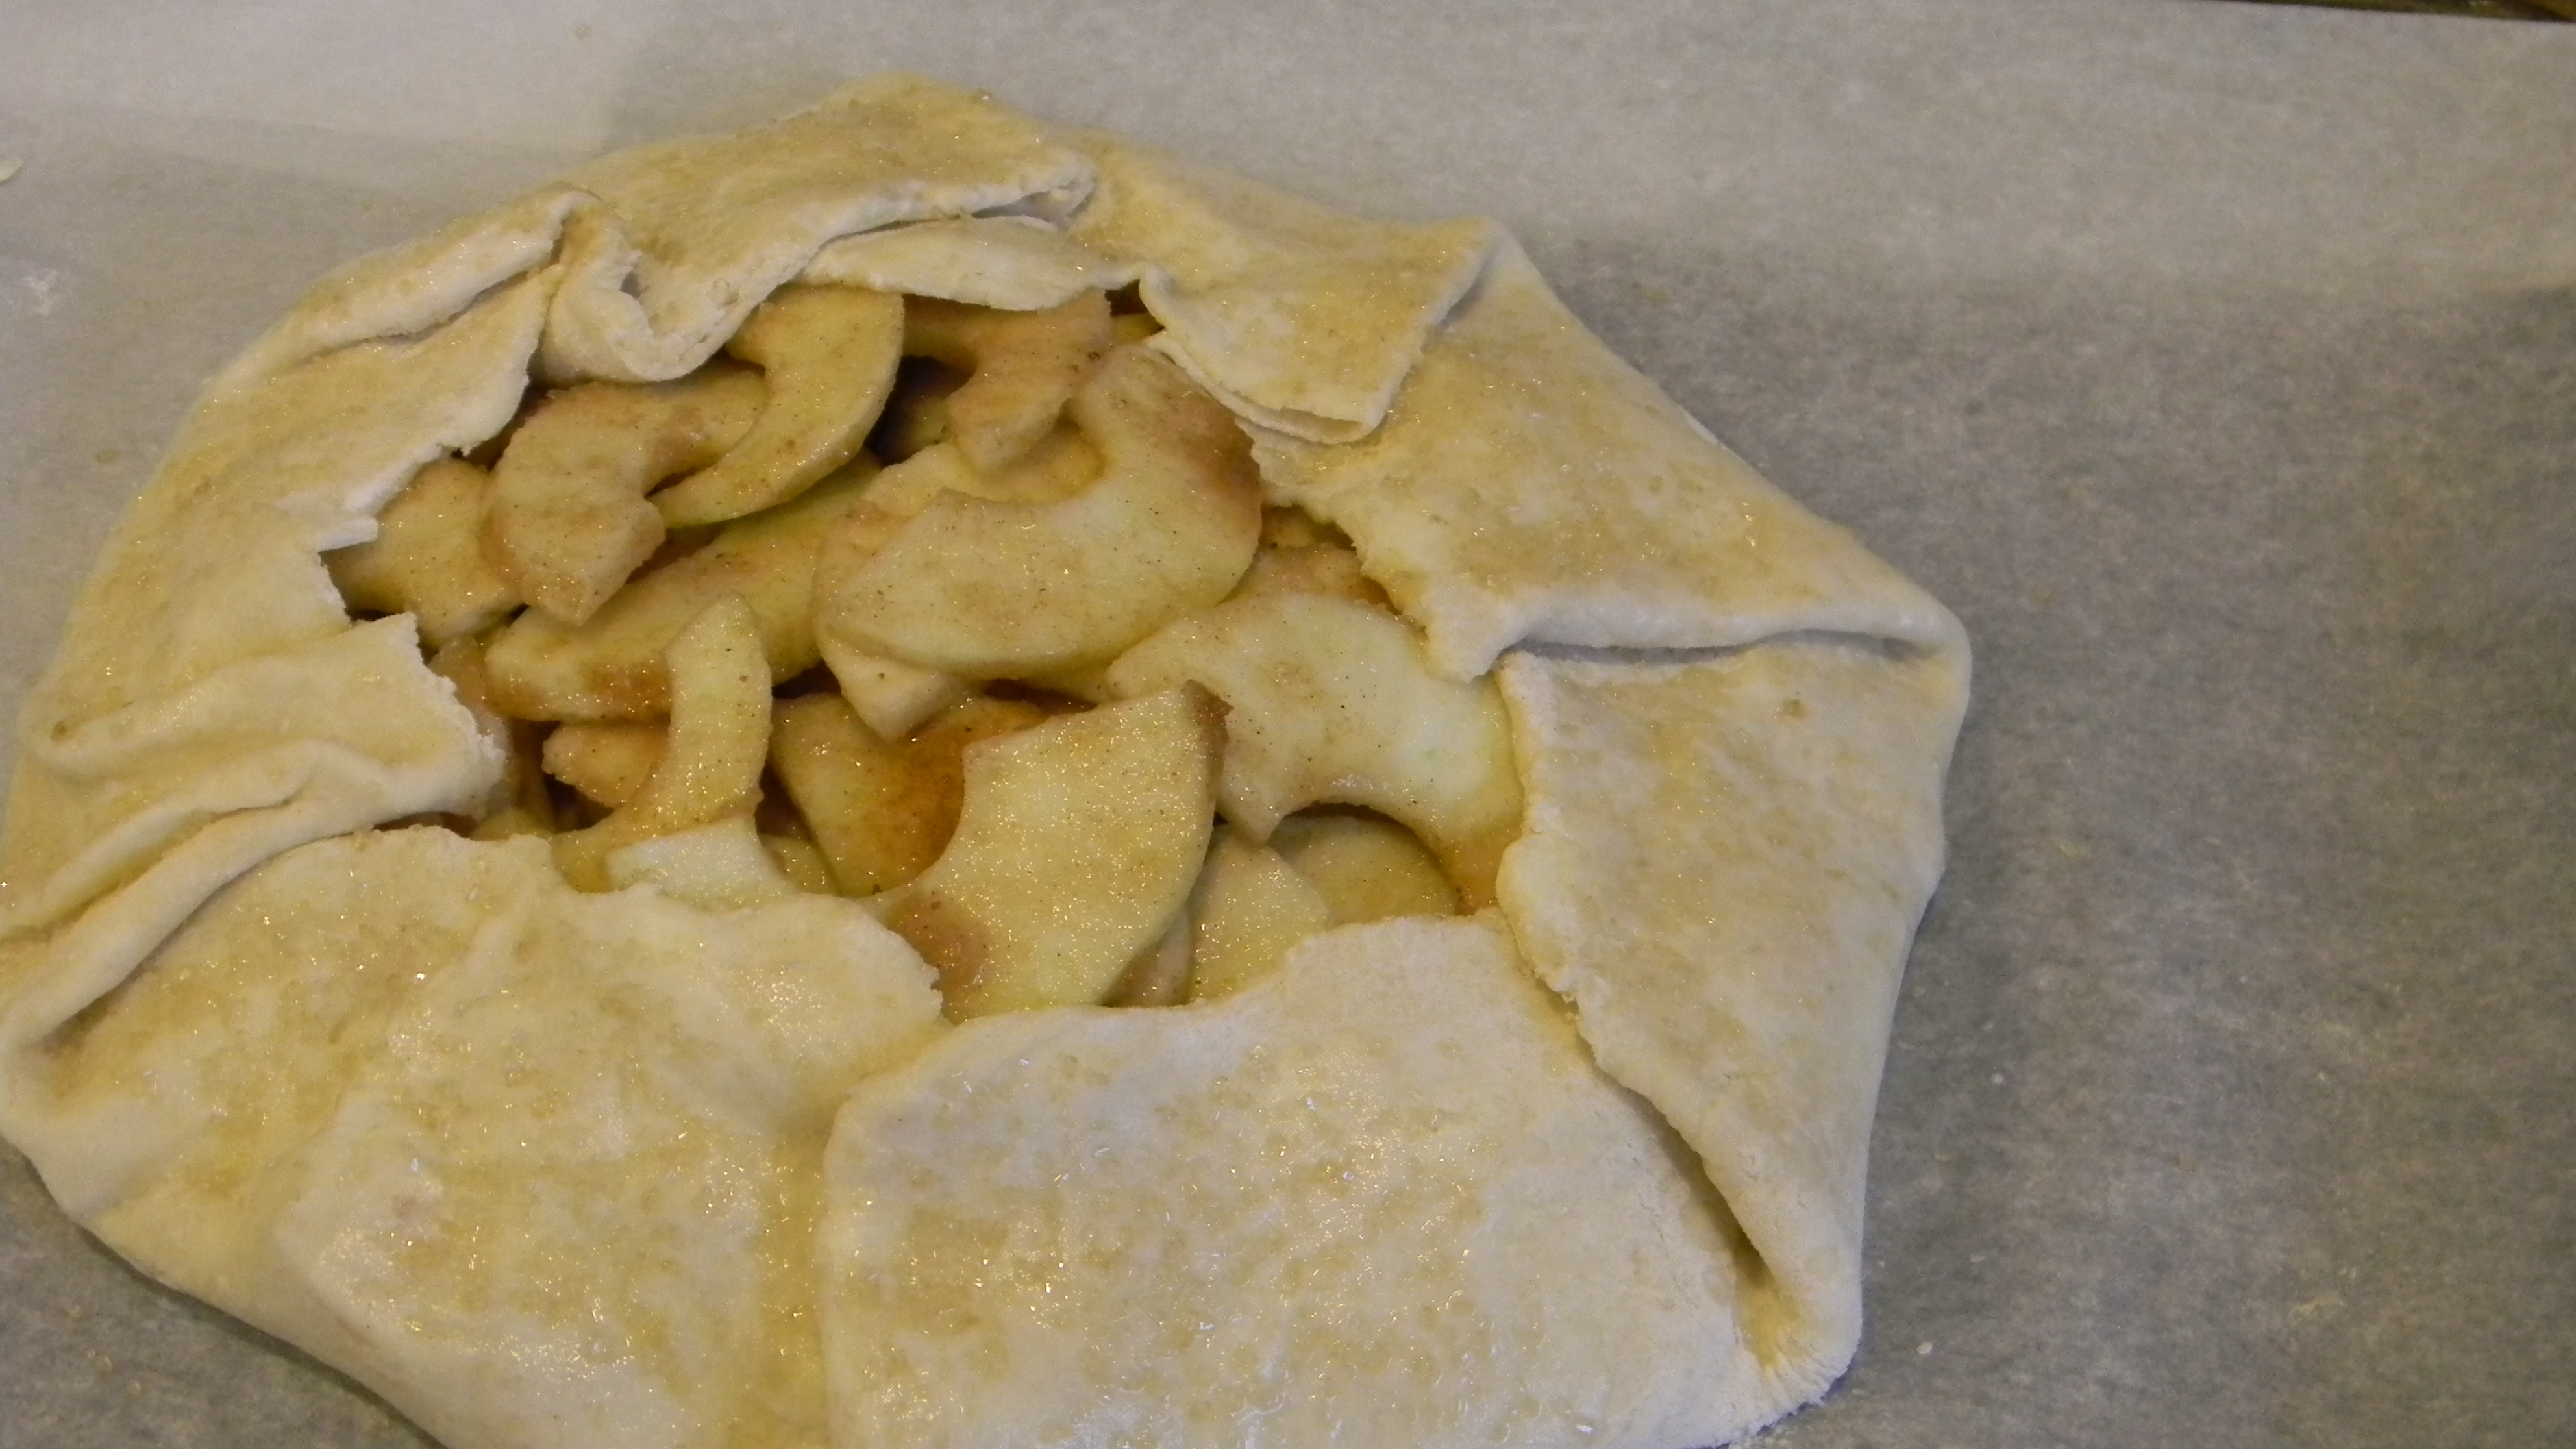
My rustic pie ready for the oven.

Ta, da!
Ok….how easy was that? Just think of all those delicious pies and tarts ahead of me. I can’t wait to tackle all of them! Val has offered to be the official taste-tester.
“When I walk into my kitchen today, I am not alone. Whether we know it or not, none of us is. We bring fathers and mothers and kitchen tables, and every meal we have ever eaten. Food is never just food. It’s also a way of getting at something else; who we are, who we have been, and who we want to be.”
–Molly Wizenberg


Looks pretty darn tasty to me!!!!!!!! Only thing missing is a big ol’ dollup of ICE CREAM. LOL hugs, julie
Make that warmed with ice cream! xo